How To Make A Fantastic DIY Cardboard Standee
by Ann Mifsud
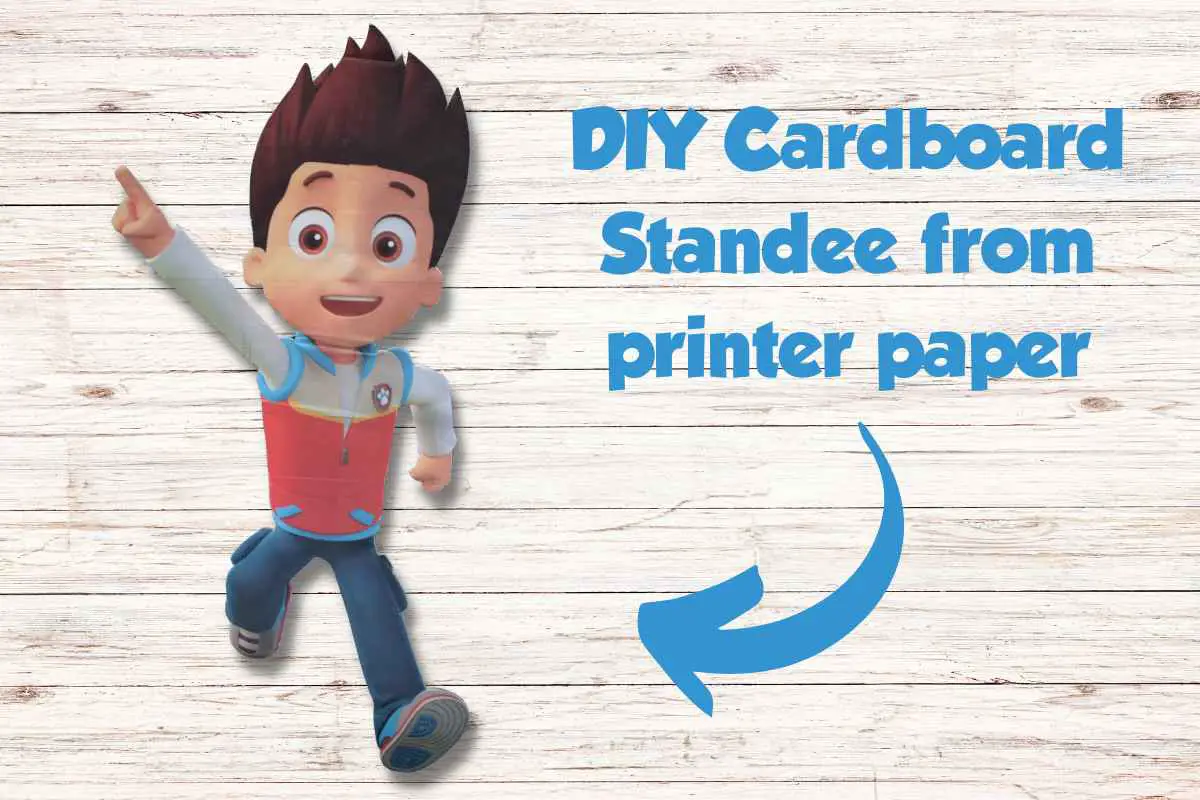
If you want to surpass all expectations at your next kid’s themed party, consider making your own life-size cardboard standee. Using our method, you can customize your stand-up sign as much as you want without spending a fortune and using only equipment and materials you probably already have at home.
Buying a ready-made 68” (172cm) stand-up display will cost you around $50, and you won’t have the luxury of personalizing it. On the other hand, making a life-size stand-up display at home will only cost you a fraction of the price.
To make a DIY standee display, you need a computer, a color printer, printer paper (A4 or US letter size), a large piece of cardboard, glue, scissors and craft knife. Use your preferred word processor and follow our comprehensive guide to create the most astounding homemade cardboard cutout that no guest will forget.
Affiliate disclosure: As Amazon Associates we earn from qualifying purchases.
You can use a cardboard standee at your party venue, as a life-size welcome sign, as part of your kid’s themed party decor, or even as an appealing photo booth background.
Here’s what you will learn in this guide.
Our idea behind making a life-size cardboard standee using printer paper is simple.
You need a good-quality image you can enlarge and divide into smaller parts. Then print each A4 or US letter segment using your home printer.
Next, cut out the excess at the edges and glue all pieces on a large cardboard. Finally, trim all around the standee and attach to it a cardboard stand to make it stay straight up.
Let’s go step by step.
1. How to pick the right image for a DIY stand-up display
Here you have two options.
You can choose a photo you have taken yourself or find an online image. In both cases, you need a good-quality picture to avoid ugly pixelation when you enlarge it. To get a life-size standee you need to enlarge your A4 or US letter design by roughly 36 times.
If you are taking the picture, make sure it is at least 3MB.
On the other hand, to get the best images online to create a stand-up display, search for high-resolution pictures. In our case, we typed in the Google search bar, “high-resolution Ryder Paw Patrol image” and clicked on images.
Most online pictures are available for personal use, but check if there are any other restrictions for their use. We got ours from toppng.com.
You are now ready to start making your party standee on a word processor.
2. How to make a diy cardboard standee using only A4 or US letter size paper
Step 1
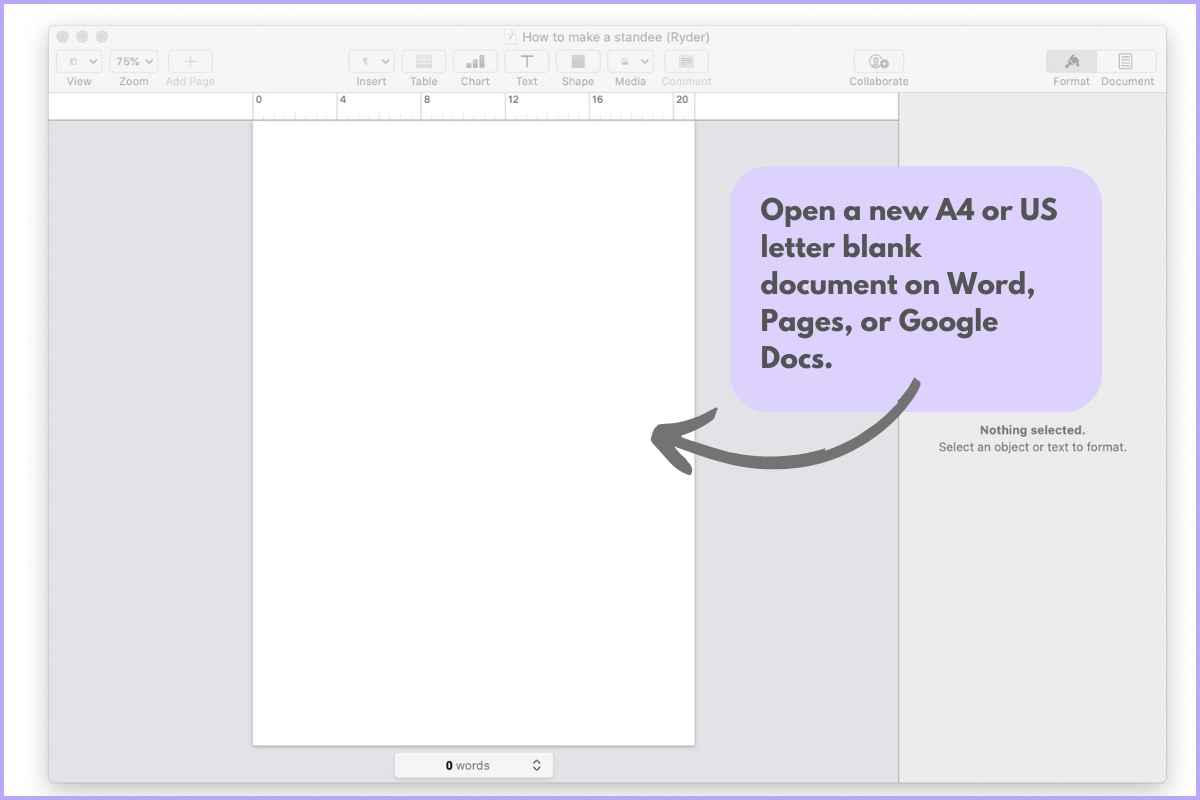
Open a new A4 or US letter blank document on Word, Pages, or Google Docs. Choose “portrait” or “landscape” from the page setup, depending on how you want your standee to be oriented. In our example, we will be creating an upright display of Ryder from Paw Patrol.
Pro Tip: A great idea is to make a custom stand-up display of the birthday boy or girl for their birthday party. You won’t easily find a ready-made one, but you can do one without difficulty using our method.
Step 2
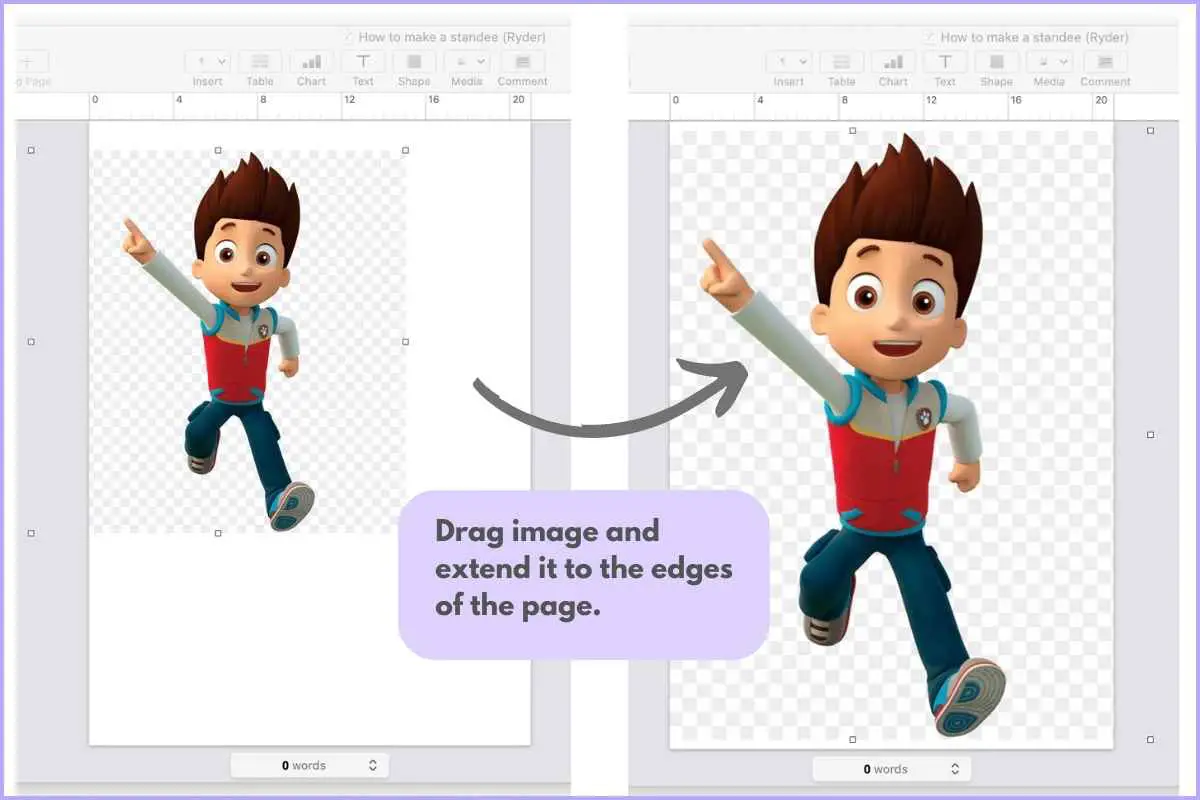
Drag your image on a blank page in the word processor and extend it to the edges of the page.
Step 3
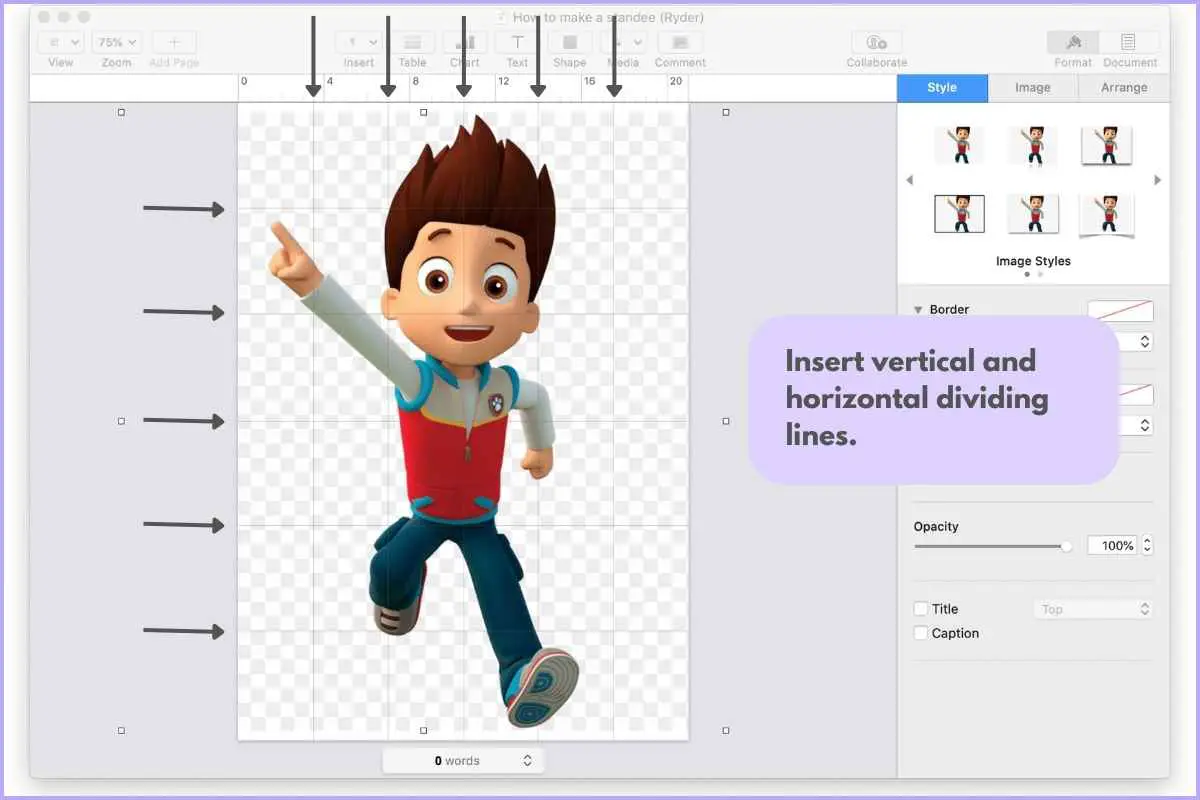
Divide the image into 36 portions by inserting vertical and horizontal dividing lines as shown below. Use faint grey lines, 0.25pt thick.
Step 4
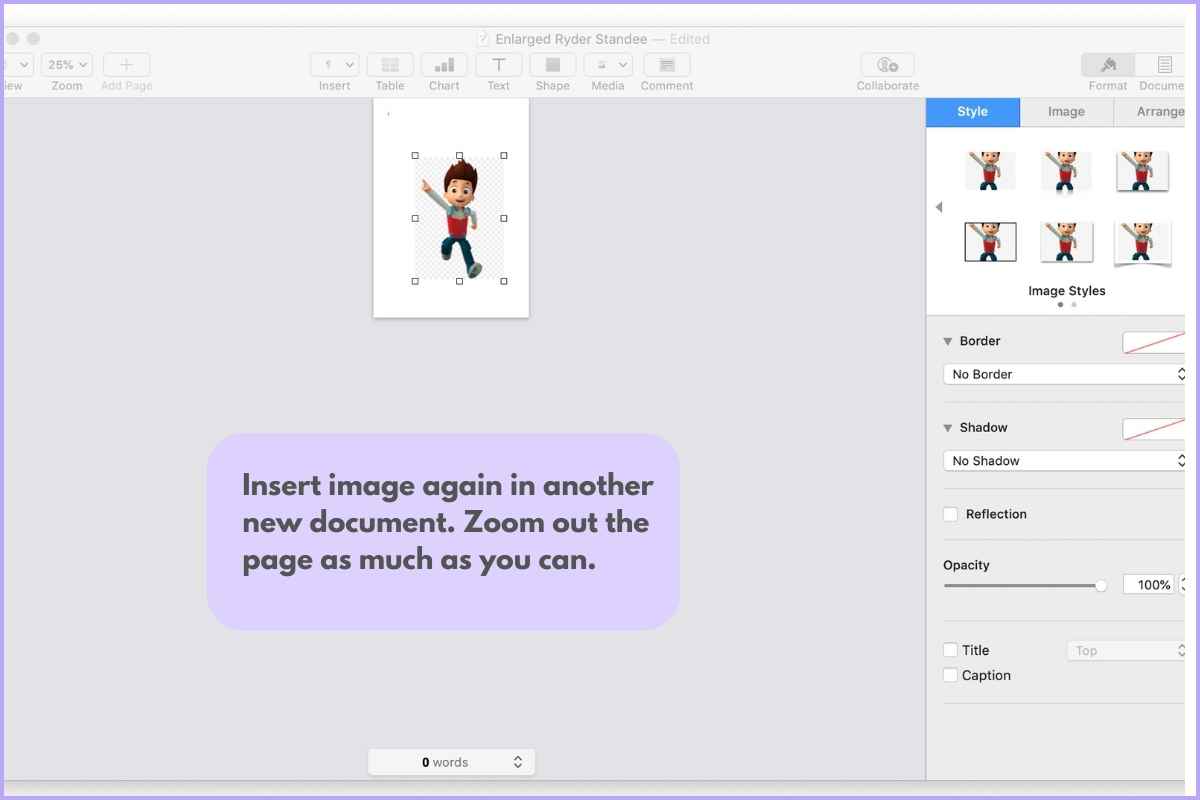
Export your design to PDF and insert it again in another new document.
Step 5
Zoom out the page as much as you can, to be able to see what you will be doing next.
Grab the image from the right-hand bottom corner and extend it until one portion (out of all 36) covers the blank page.
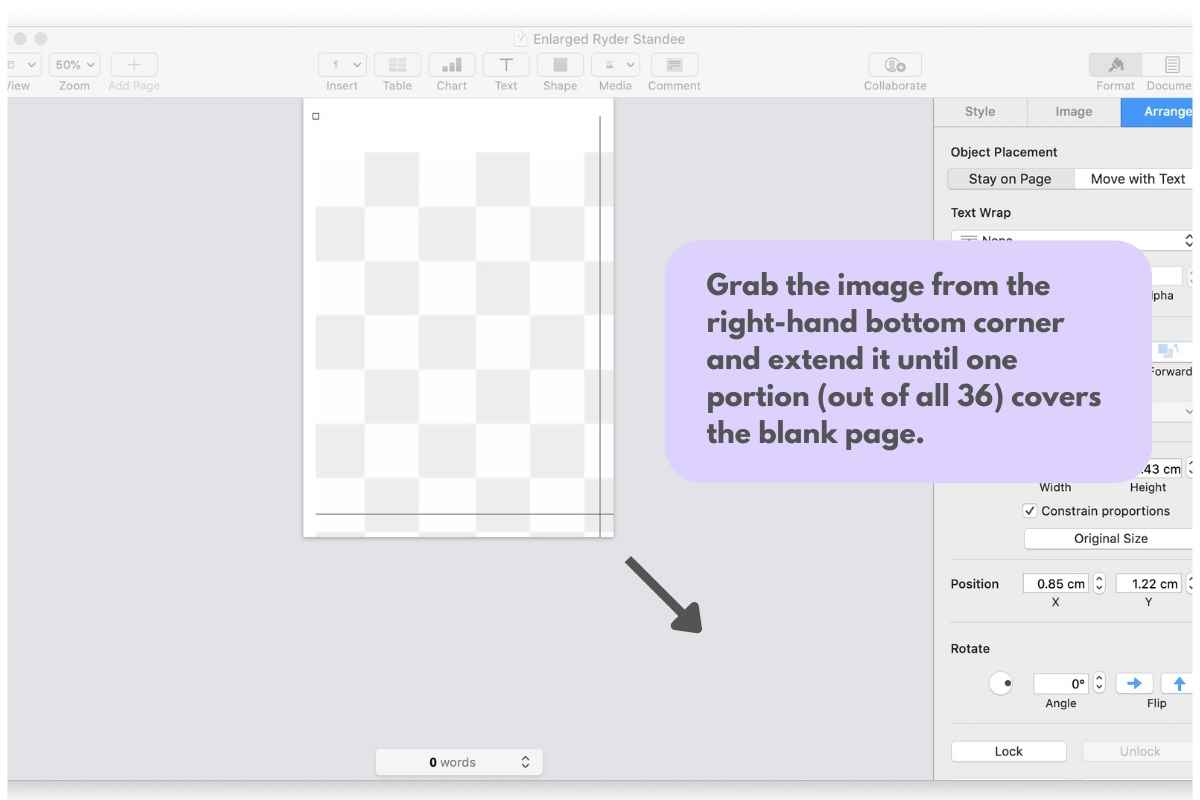
Then copy the enlarged image and paste it on page two. Next, move the image so that the second segment will cover the second page.
Repeat this sequence until you have all 36 pages ready.
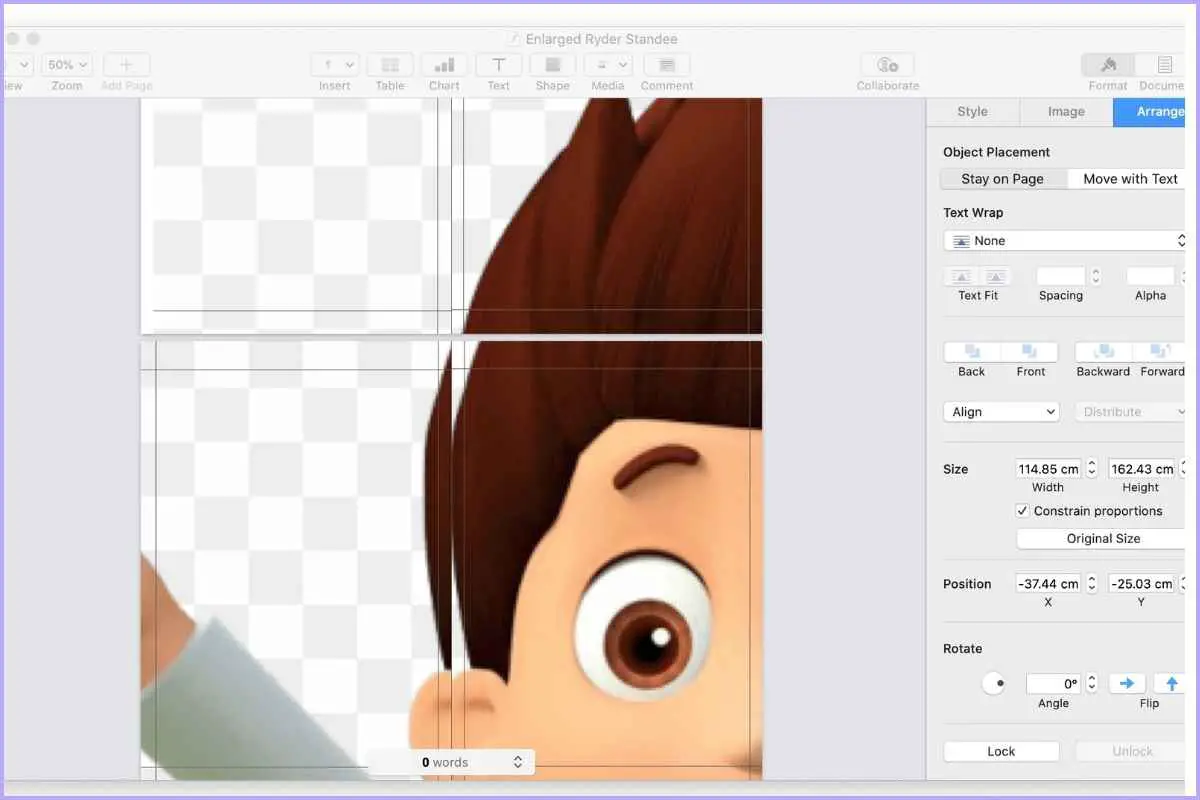
Caution: It is very important to copy and paste the enlarged image into the subsequent pages. This will ensure that all parts will have the same intended size.
Step 6
Print all 36 pages with your home printer or at your local copy shop.
3. How to assemble the stand-up sign on cardboard
Start by placing all printouts on a large working top or the floor and check if your custom stand-up looks good. Like this, you will also know the size of the cardboard you need to which all papers will be attached.
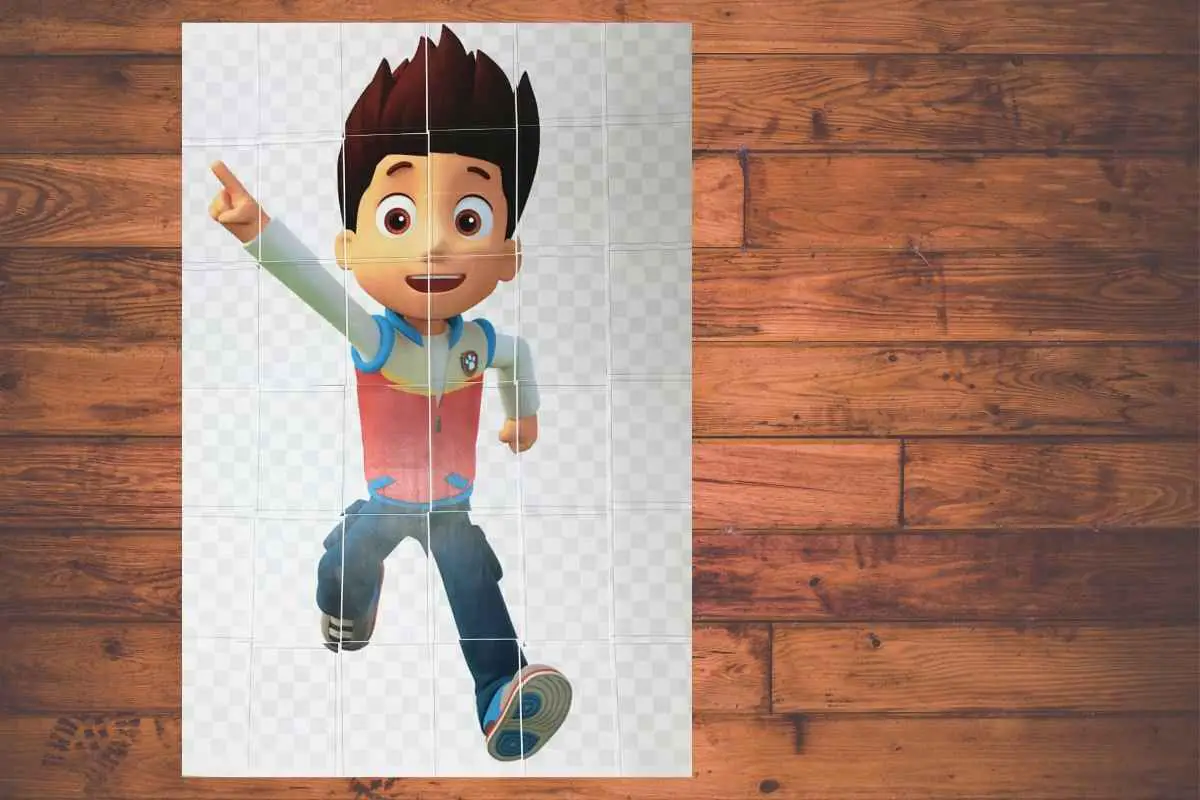
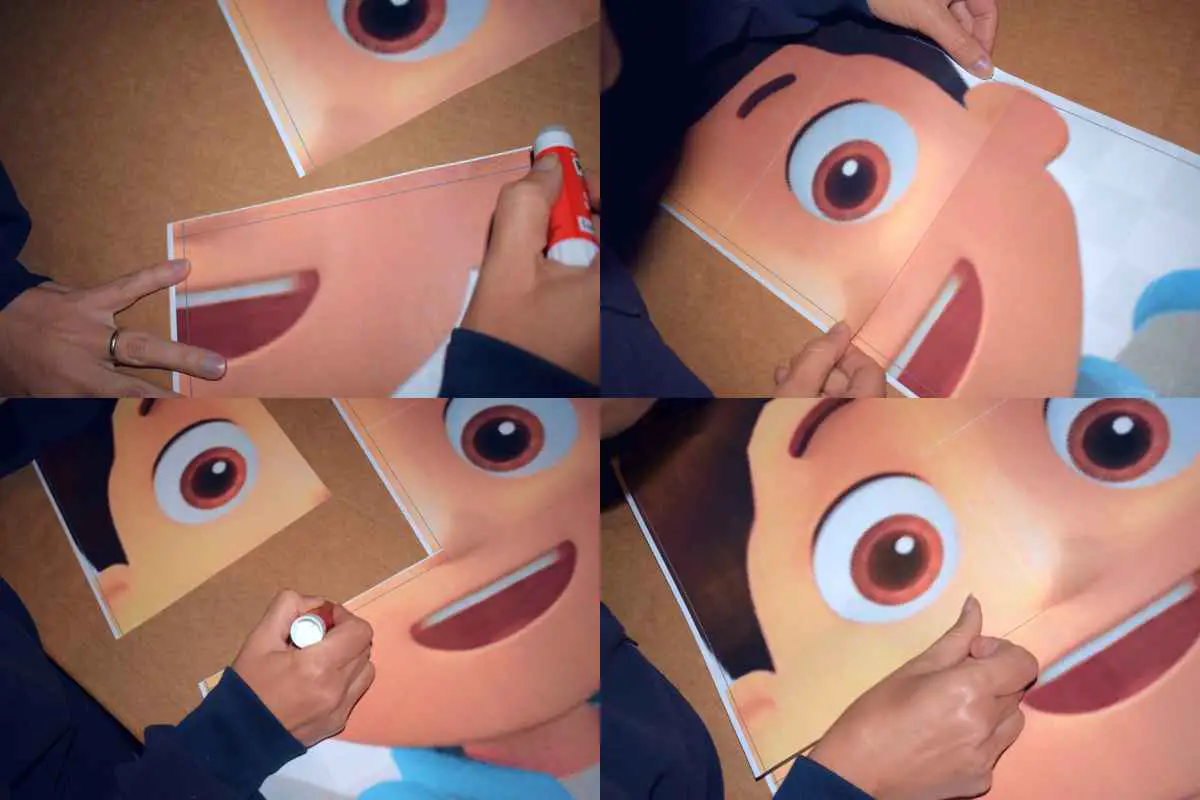
Next, crop the edges of each part by cutting with a pair of scissors along the grey lines.
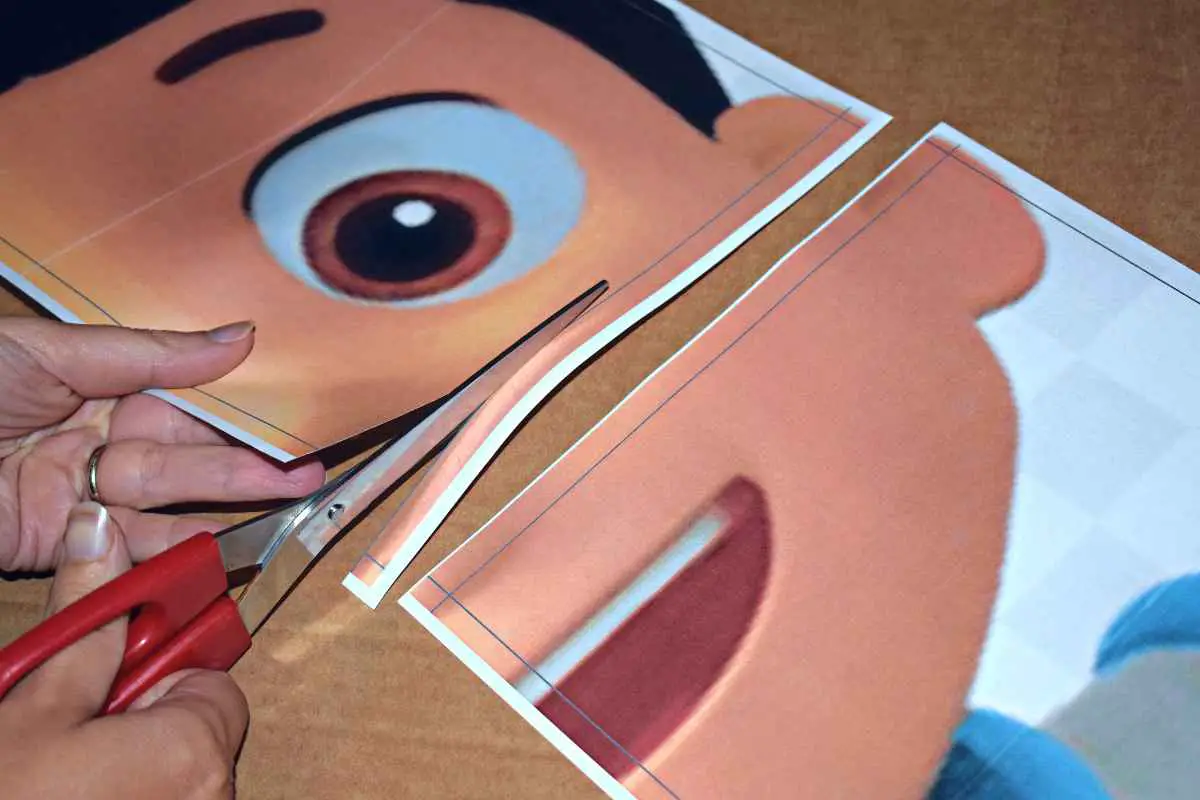
It is not necessary to cut along all the lines since you can overlap some of the papers on top of each other.
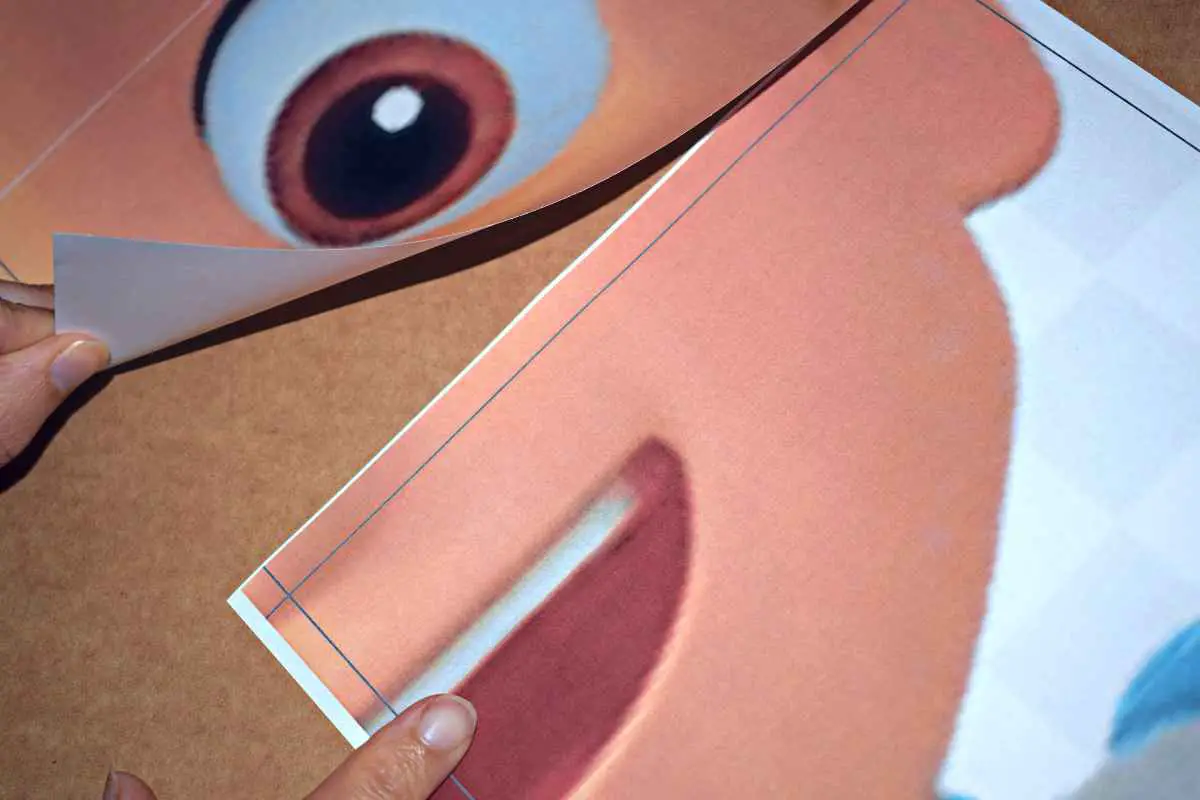
Glue the trimmed papers together starting from the middle of the picture. In this case we prefered to begin with the face.
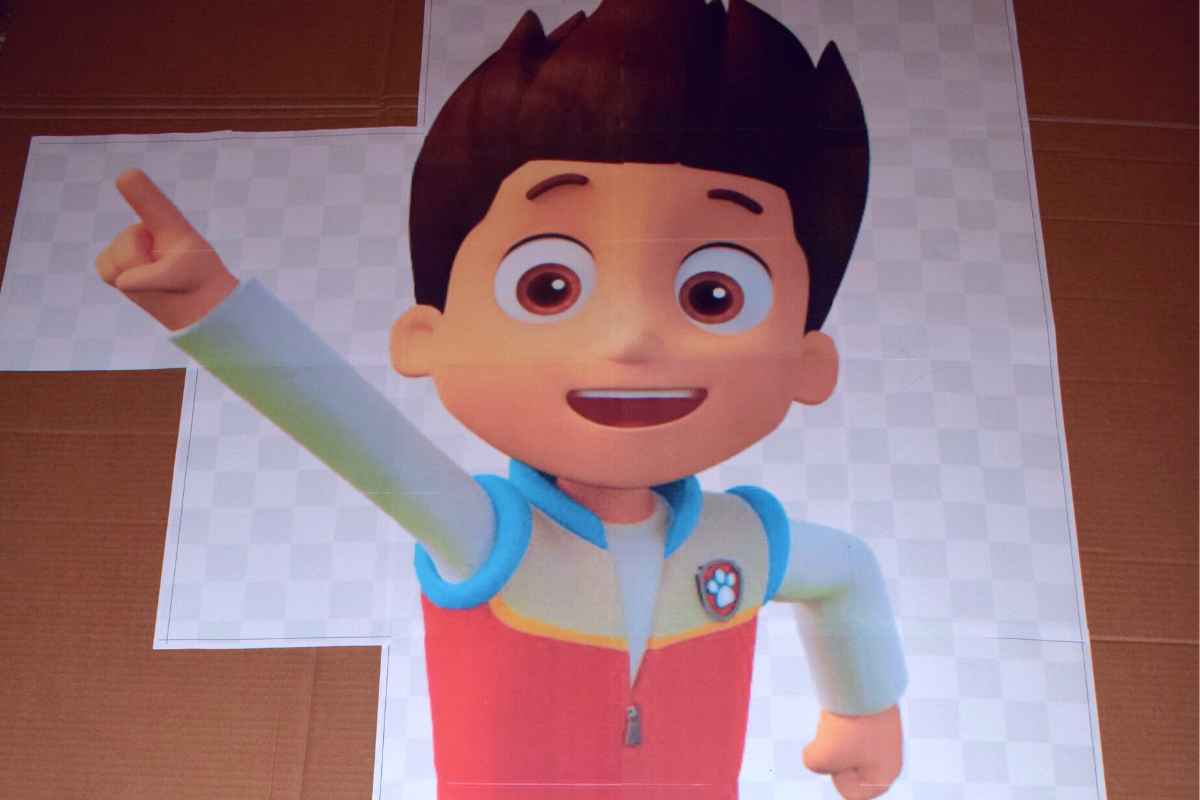
When you have put together all the pieces, apply glue to the back of the papers and stick them carefully to the cardboard.
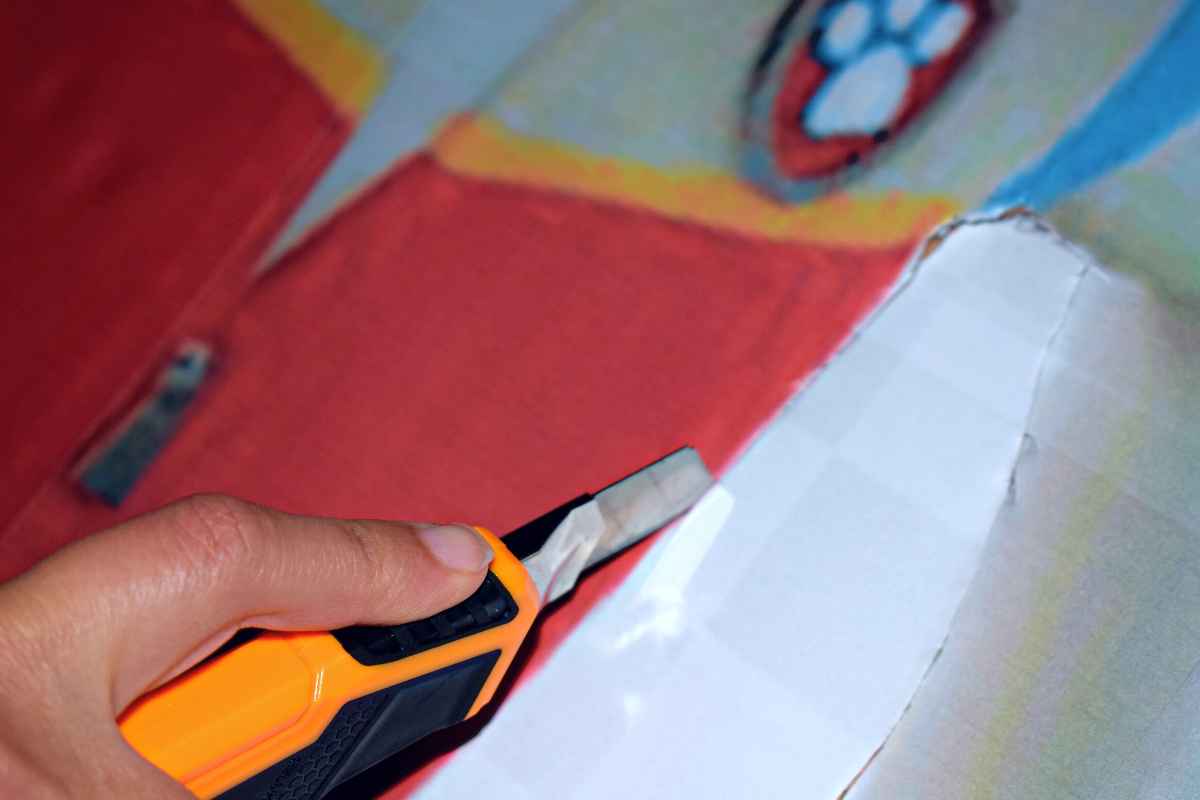
Finally, trim your full-size DIY standee by cutting along the perimeter of the image.
4. How to make the homemade standee stay upright
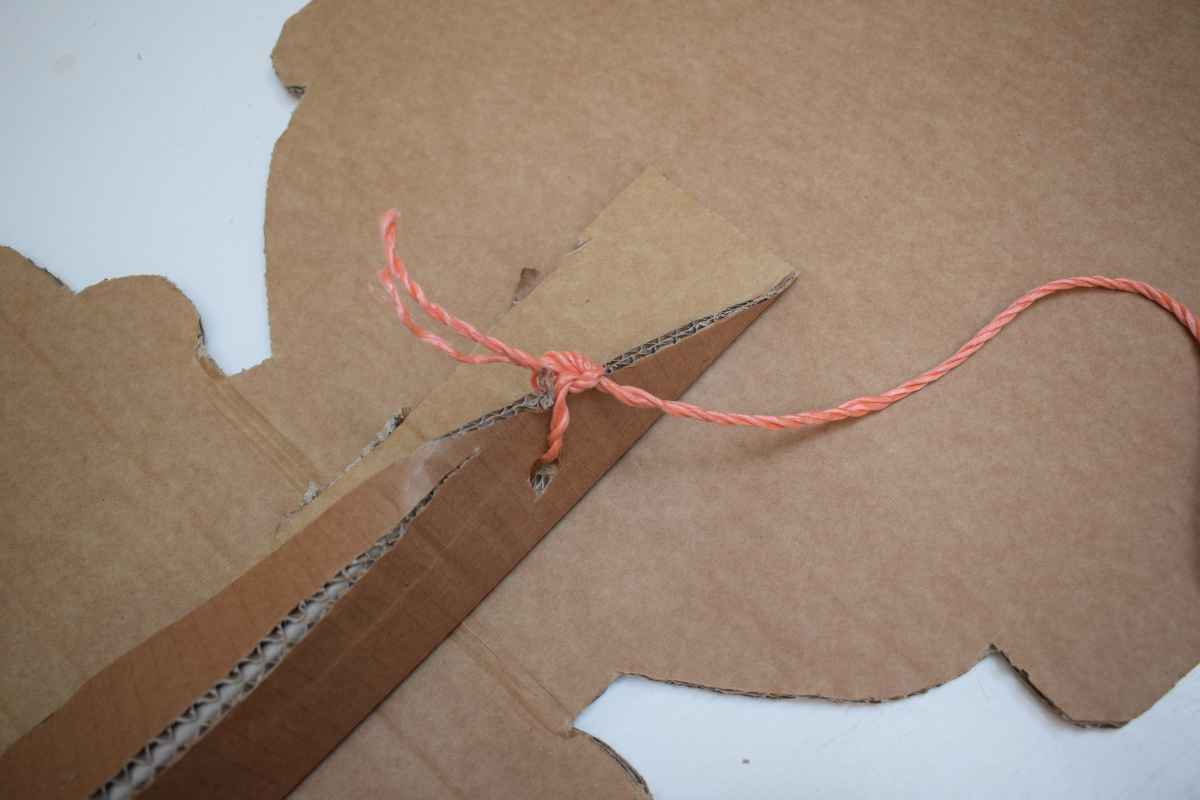
Attach another piece of cardboard to the back of the standee. Tie a nylon string to it and it’s ready to be hung anywhere at your party venue.
Concluding how to make a fantastic cardboard standee
In this guide, we have taken you through all the steps to create an inexpensive, yet awesome DIY cardboard stand-up sign.
You will be using a simple word processor on your computer, a printer, A4 or US letter size printer paper, cardboard, glue, and scissors to construct a custom-made standee.
You may also want to know how to make…
Make Fabulous DIY Party Signs
Whether you want to welcome your guests with a good-looking sign as you usher them at your kid’s party venue or you need to decorate the place with eye-catching messages, then this is the guide for you.

Custom Chip Bags Step By Step
Turning ordinary chip bags into unique party items is a step in the right direction to make your party stand out. All you need is our simple step-by-step guide to create DIY custom chip bags.
How To Make Popcorn Boxes At Home
We have compiled this easy step-by-step guide to make homemade popcorn boxes after realizing that it is next to impossible to get custom-made ones without spending a fortune.

Hi I'm Ann
Mom to three kids, I am the proud co-founder of Easy Kids' Parties. After a career in journalism and education, I diverted my skills to creating this website, with the aim of helping all those parents out there who wish to organize amazing and memorable parties for their kids but feel overwhelmed at the idea. Discover more...
Legal Information
Easy Kids Parties is a participant in Amazon Services LLC Associates Program. As Amazon Associates we earn from qualifying purchases. We also participate in other affiliate programs. Easy Kids Parties is compensated for referring business to these companies at no extra cost to you.
