Custom Chip Bags Step By Step
It’s the little details that take a kids’ party from fun to unforgettable. While most focus on themed food and decorations, few think to turn everyday items into personalized, theme-matching touches — and that’s what makes all the difference.

Written by Ann Mifsud
Last Updated: May 27, 2025 | 7 min Read

Affiliate disclosure: As Amazon Associates we earn from qualifying purchases.
Turning ordinary chip bags into unique party items is a step in the right direction to make your party stand out. All you need is our simple step-by-step guide to create DIY custom chip bags.
Contents
Let’s start with the idea for your themed chip bag.
1. How to come up with the best idea for a personalized chip bag
If you have already set your mind on a particular theme for your kid’s party, then go with that theme and make your DIY chip bags to fit that theme.
If, on the other hand, you are not planning to go for a particular theme, then we have a simple process to come up with the best idea for personalized party printables and decorations, and in this case, a chip bag.
1. Picture the person or occasion you’re planning the party for.
2. Write down 3–6 words or phrases that come to mind — think of:
-
-
Their likes or hobbies
-
Favorite color or sport
-
A milestone or special wish they’ve shared
-
3. If it’s a family or national observance, consider:
-
-
Its meaning and symbolism
-
Common colors, numbers, or display items
-
4. Turn those words into visual ideas — these will guide what to include on your custom chip bag.
We go into more detail and examples on how this process works in, How To Make An Eye-Catching Party Banner.
Next comes the design of your personalized chip bag.
2. How to design a custom chip bag quickly
The quickest and easiest way to design a custom-made chip bag is using a word processor. Here’s how we do it.
Step 1
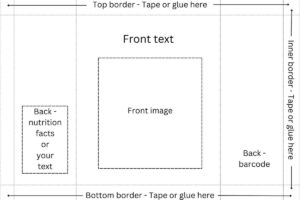
Download our free printable chip bag template. It is a transparent (png) file.
Step 2
Open a new blank document in Word, Pages, or Google Docs, and choose landscape from page setup.
Step 3
Drag our transparent chip bag template on the blank page.

Step 4
Resize the chip bag template by extending it to the limits of the whole page. In doing so on an A4/Us Letter page you will end up with the right measurements for a custom chip bag that will hold a 1oz (28g) chip bag, like the ones found in the Frito Lay Classic Assorted Box.

Step 5
Change the page background to the color you have in mind for your DIY chip bags.
If you are using Microsoft Word go to Design > Page Color > Theme Colors or Standard Colors.
If you are working on Pages (Mac), click on Document (top right-hand corner) > Section > Background > Color Fill.
If you are editing on Google Docs, select File > Page Setup > Page Color.
Step 6
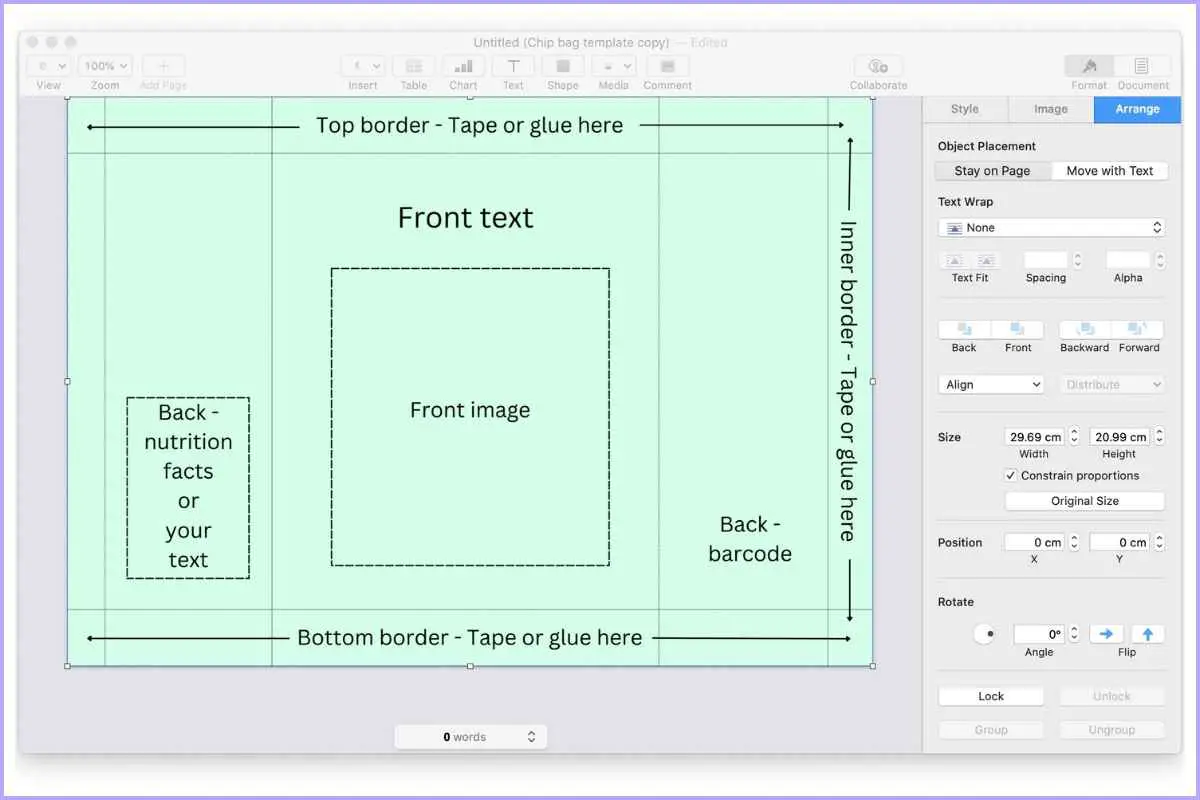
Add text and image/s to the front of the chip bag. For ease of use, we have outlined where you can add a text box and the front image. Don’t worry about the text and markings of the template. When you finish with your customizations you can remove the template.

Next, add more text on both back flaps, as shown in our template. We have provided some fun nutrition facts and a barcode in the same download if you wish to use them.

Consecutively, add two rectangles covering all the top and bottom borders and you are done with the design of your chip bag.

Step 7
Remove our transparent (png) chip bag template and spend time looking at your finished product tweaking any element if necessary.

3. How to assemble a DIY chip bag effortlessly
Finally, you are ready to assemble your DIY custom chip bags.
Step 1
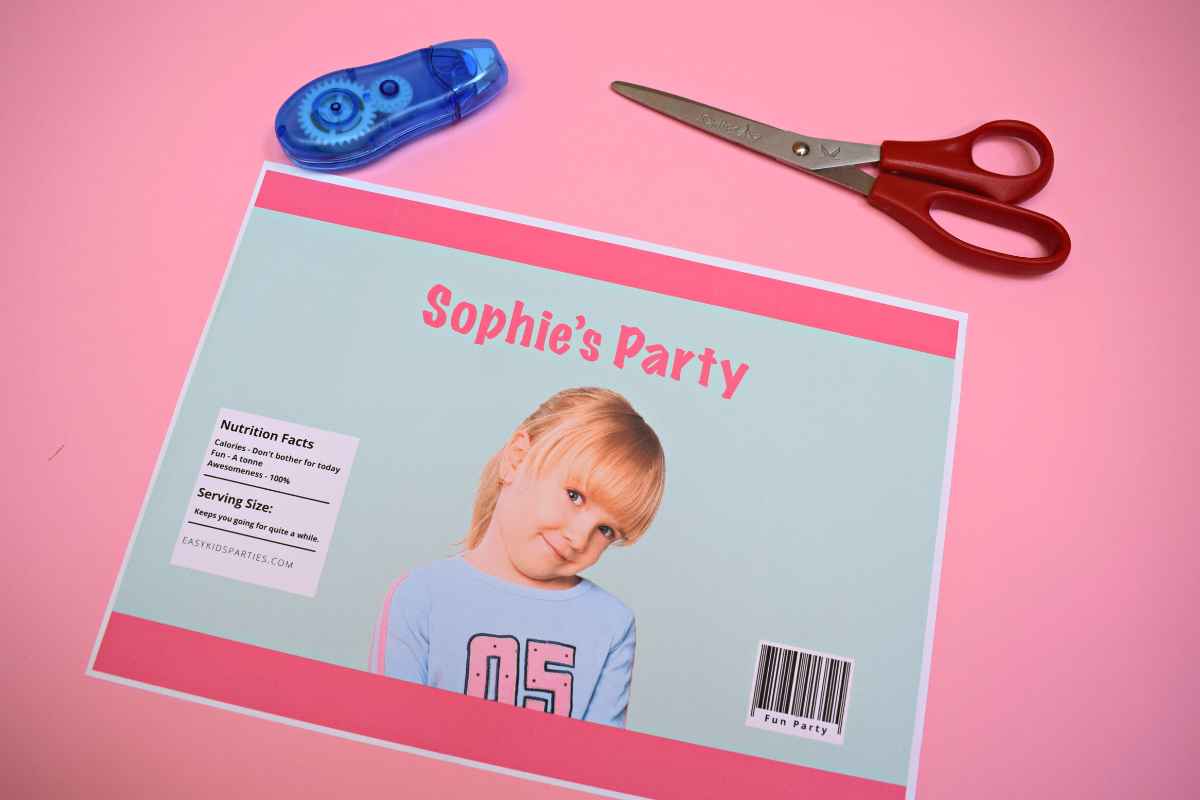
Print your DIY chip bag, preferably on thin, glossy (A4/Us Letter) paper.
Adjust your printer settings to glossy paper and borderless printing.
Step 2
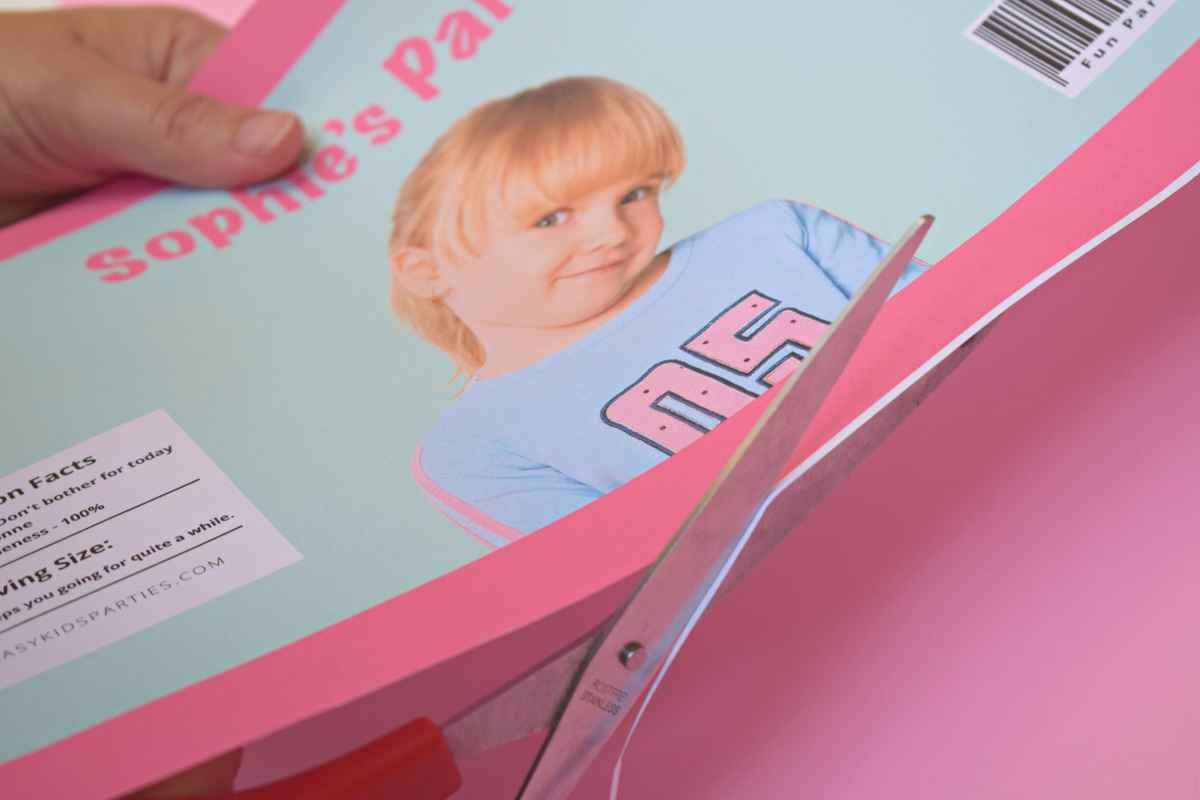
Cut out any white outer border.
Step 3
Use double-sided roller tape (or glue stick) to go over the bottom and inner side border.
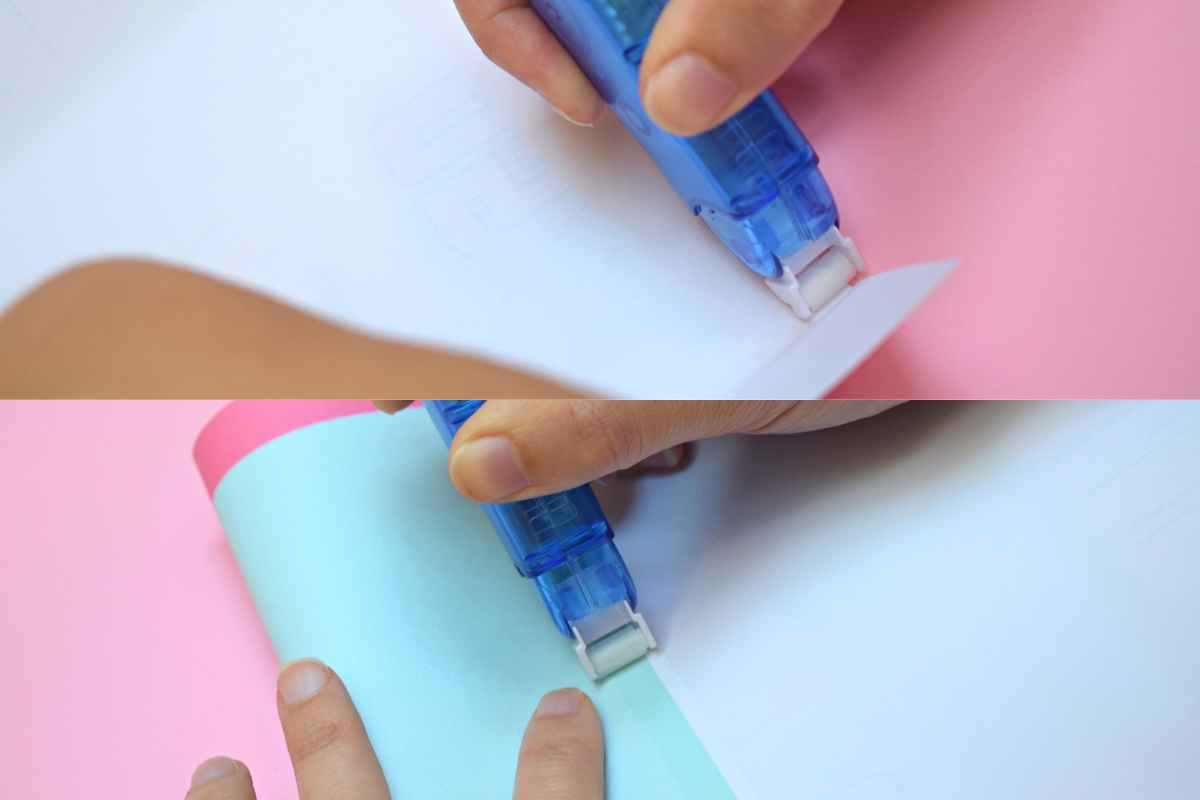
Step 4
With the chip bag facing down, fold the back flaps until they overlap just a little over each other. Press on the side edges to make the back flaps stick together.
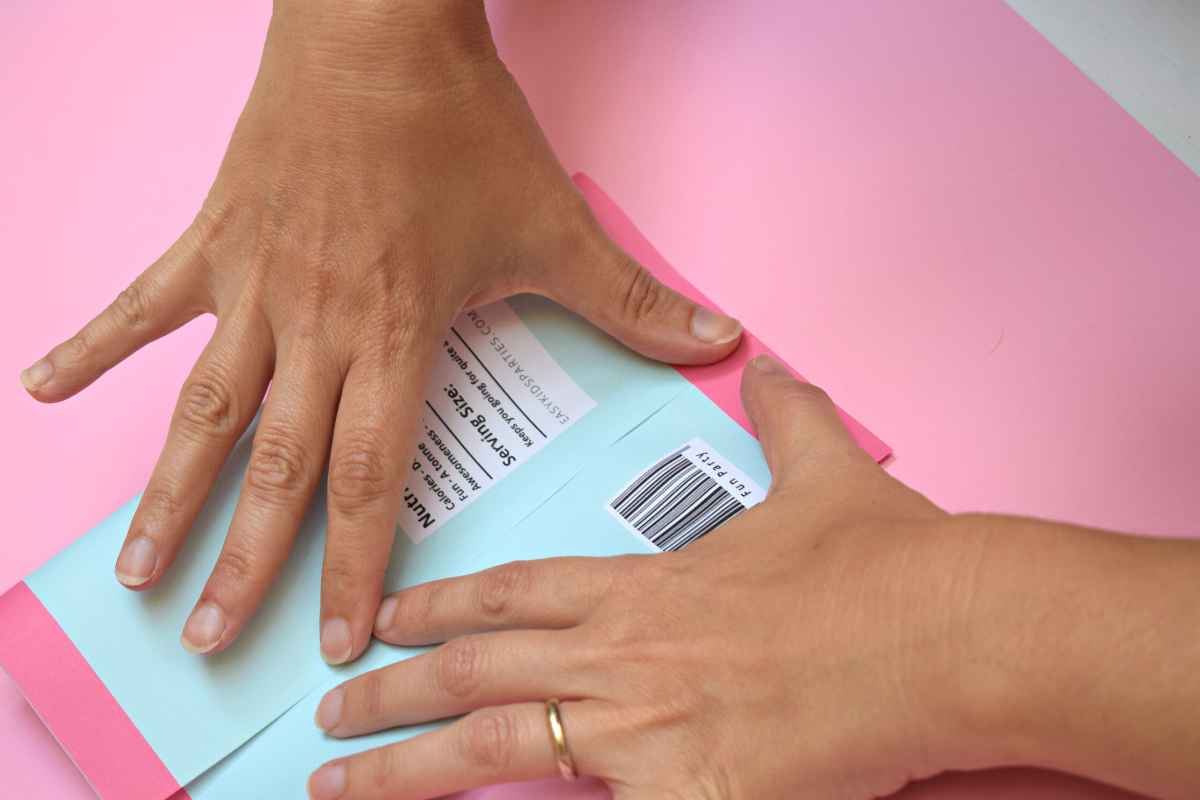
Step 5
Press together the bottom borders, starting from the middle and moving outwards on both sides of the custom chip bag.
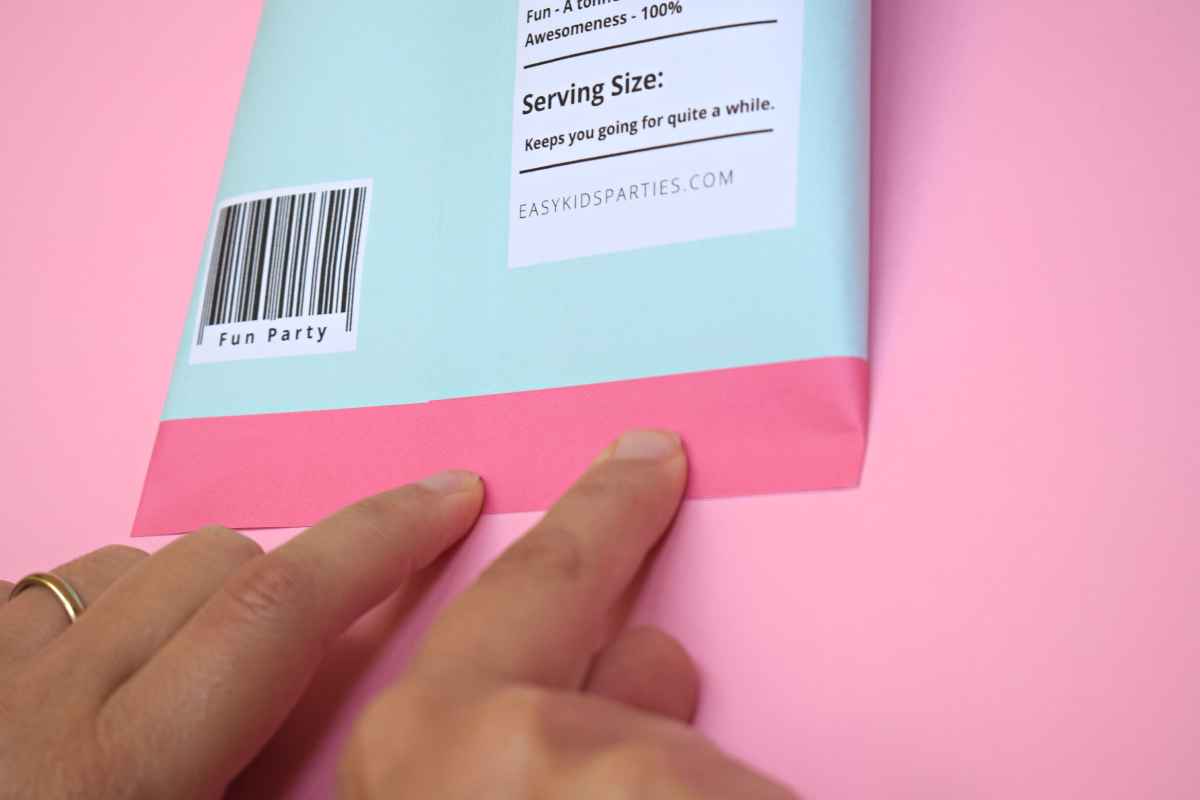
Step 6
Put a 1oz (28g) chip bag or any other treats that fit in your DIY bag and seal off the top borders in the same manner as you did with the bottom ones.
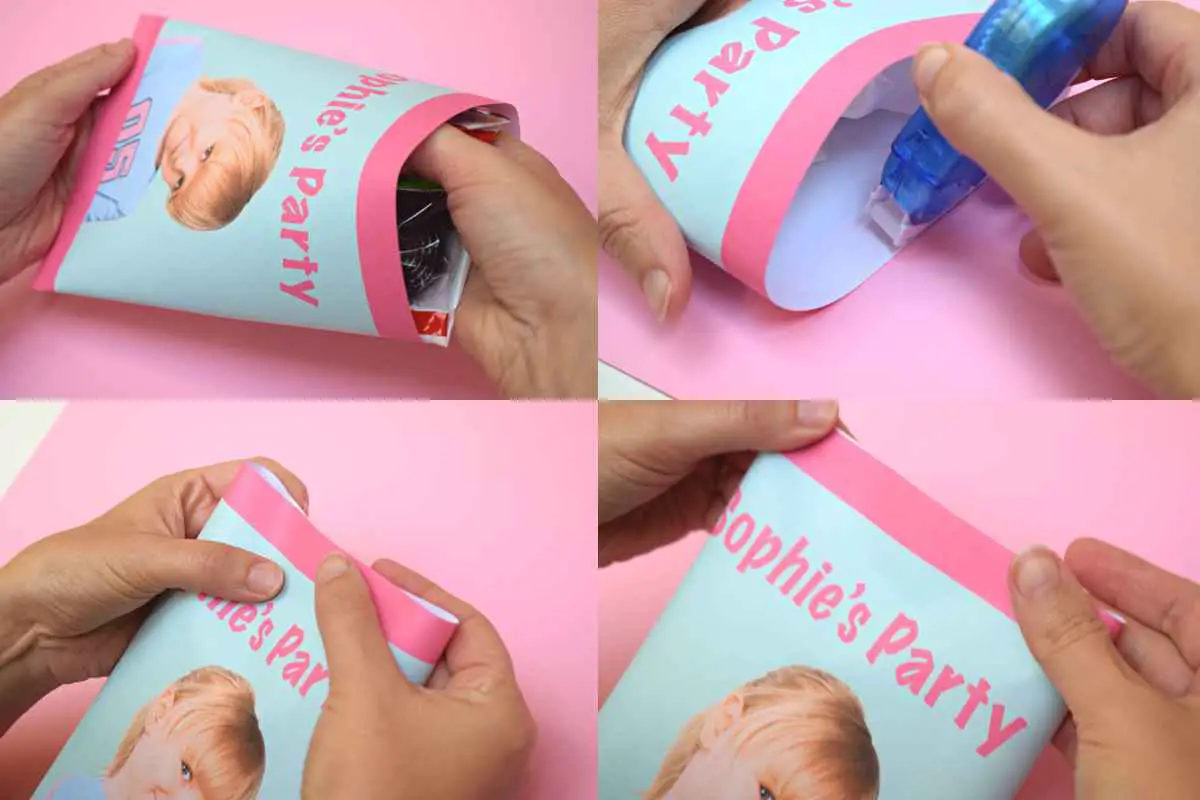
Step 7
As an option, you can use paper crimper to make creases on the upper and lower edges of your personalized chip bag. Your bags will look incredibly realistic.
Your personalized chip bags are ready to be displayed and served at your party.
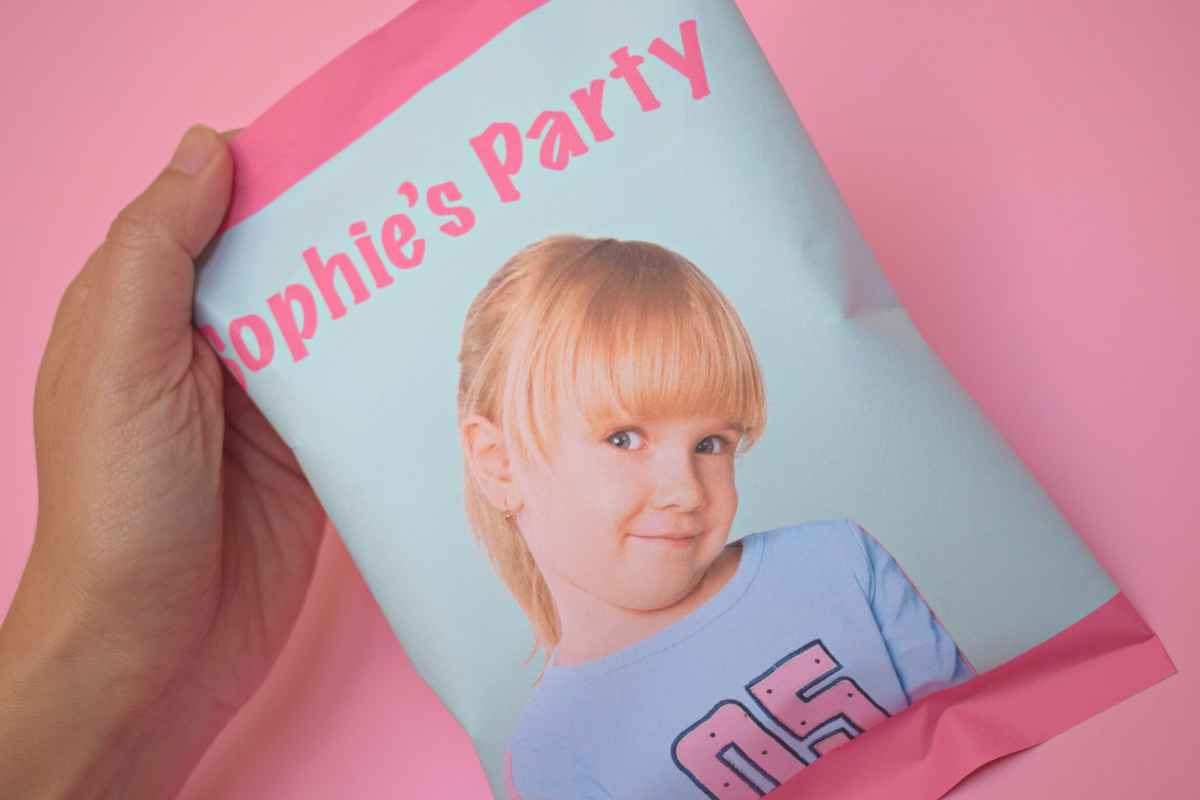
Last thoughts on how to make DIY custom chip bags
If you are after a memorable celebration, no detail is too small. Personalizing chip bags is one of the few efforts you can make to stand out from the ordinary way of doing parties at home. You can make DIY custom chip bags quickly and easily.
Follow our step-by-step instructions to come up with a good idea of what your homemade chip bags will look like, design them without necessarily being a designer, and assemble them in no time. We have prepared a free downloadable custom chip bag template to make things easier for you.
Related Posts
How To Keep Balloons From Deflating
How To Keep Balloons From DeflatingBalloons are a staple decoration for parties, events, and celebrations. However, nothing dampens the festive atmosphere more than drooping, deflated balloons. Understanding how to keep balloons from deflating prematurely can ensure...

What Time Of Day Is Best For A Kids’ Party?
What Time Of Day Is Best For A Kids’ Party?If you're planning a special event for your kid, you surely want it to be a success on all fronts. One thing you definitely want to get right is the time of day you throw the party.Written by Ann MifsudLast Updated: May 7,...
How To Keep Balloons From Popping
How To Keep Balloons From PoppingBalloons are considerably a fragile item and they need to be treated with care if they are to serve their purpose until the last guest has left the party. But why do balloons pop and how to prevent them from doing so as much as...
How To Make Food Glow In The Dark
How To Make Food Glow In The DarkWhen we first started looking into glow in the dark food, we found some ideas which we thought were good for our son's 12th birthday, only to discover that many of them did not work. So, we set about experimenting to come up with food...

How Long Should A Kid’s Party Last?
How Long Should A Kids' Party Last?The duration of any kids’ party greatly depends on the age of the guests you are inviting. Babies' parties should not last more than an 1½ hours. The recommended length of a party for young children is 2 to 2½ hours. Celebrations for...

How To Ask For Money Instead Of Gifts For Birthday
How To Ask For Money Instead Of Gifts For Birthdayby Ann MifsudIn today's world, where material possessions abound, many people are looking for ways to simplify their lives and prioritize experiences over things. When organizing a children's birthday party or, for...

How To Say No Toys For A Birthday Party
How To Say No Toys For A Birthday Partyby Ann MifsudPlanning a birthday party for your child is an exciting endeavor, but it often comes with the dilemma of excessive toy gifts. While presents are a traditional part of birthday celebrations, many parents and...

Do You Serve Food To Adults At A Kids’ Party?
Do You Serve Food To Adults At A Kids' Party?by Ann MifsudIf you’re throwing a party for your kid and expecting parents to hang around, the question of whether you serve food to accompanying adults legitimately beckons.Serving food to accompanying adults at your kid’s...

Can Balloons Stay In The Cold?
Can Balloons Stay In The Cold?by Ann MifsudIt is a well-known fact that when balloons are subject to hot conditions, they will not last long. But when it comes to exposing balloons to the cold, it is somehow a bit trickier. Do they deflate as they do in hot...

Should you have a birthday party for your kid every year?
Should You Have A Birthday Party For Your Kid Every Year?by Ann MifsudMost young kids enjoy counting down the months, weeks, days to their birthday. They love telling people they meet, sometimes even nice strangers in an elevator, that they’re going to be a year...
